Tuesday, December 28, 2010

Eating In

Sorry again about the hiatus... we all got sick- again! Anyways, last week me and Avi went to see In The Heights (great, by the way), and we ate at Wolf & Lamb, which, was totally overrated and we were very disappointed! The show definitely made up for the less than impressive anniversary dinner, our anniversary being, TODAY! It's FREEZING and 2 years ago on our wedding day it was sunny and 60 degrees. Yup, global warming? I think not (I think that reference makes sense. If not, just ignore it :-).

So, my goal was to recreate the meal but make it MUCH BETTER!!!!! I got chicken breast stuffed with mushroom and asparagus with "herb roasted tomato"- the chicken was basically a TOTALLY under-seasoned 4 biter, with one roasted cherry tomato on the side. Avi got a hangar steak with chimichurri, though there was barely any flavor there. 2 weeks ago I made stuffed chicken for the first time. I did it with dark meat chicken on the bone, and stuffed the stuffing (for lack of a better word) under the skin. The next week I tried the same method but on very thinly pounded white meat chicken cutlets- much better! It's a healthier take on chicken pastrami roll-ups. It came out delicious. So even though it was prior to our meal at Wolf & Lamb, I'd definitely prefer that over their stuffed chicken version any day. Then, for Shabbos I made hangar steak with my own version of chimuchurri and I think it came out great! So here goes:

Stuffed Chicken Breast
-4 boneless, skinless chicken breasts
-1 onion, diced
-3 cloves garlic, minced
-3 cups fresh spinach, chopped
-salt & pepper
-Duck sauce
-Mayonnaise or olive oil
-Cornflake crumbs

-Preheat the oven to 375 degrees
-Butterfly and pound the chicken cutlets until very thin
-Brush a light layer of mayonnaise (keeps the chicken moist) or drizzle with olive oil if you don't want the extra calories, salt & pepper
-Saute the onion and garlic until lightly browned, and then add the spinach, sprinkle of salt, and let wilt
-Evenly distribute the mixture at the end of the 4 cutlets, and roll up.
-Transfer to a baking dish, pour duck sauce on top and sprinkle cornflake crumbs
-Bake for 20-25 minutes until cooked through (juices run clear)

[The exact same thing can be done using bone chicken. just under the skin with very little mayonnaise, and then stuff it. Pour duck sauce and cornflake crumbs on the top. I like to sit the chicken on orange slices.]

Stuffed Boned Chicken View #!:
 View #2:
 Stuffed Boneless Chicken Breasts

Chimichurri Sauce
Note: Chimichurri is a traditional Argentinian (I think) green sauce made with parsley, though many variations can be made using different base herbs like cilantro, for instance. It's traditionally made with red pepper flakes, though I chose to forgo the spicy. I used dried parsley because that was all I had (I keep a big Costco container in the fridge), obviously Julia Child is rolling in her grave but whatever! Next time I promise to use fresh parsley :-). My mini food processor came in SO handy for this recipe. If you have a mortar and pestle (I've always been meaning to get one, it looks so cool!) then that'd work for this too- for smashing the parsley and garlic together.

-1 cup packed parsley (not the stems), chopped
-4 cloves of garlic, roughly chopped (the food processor will do the fine chopping)- I like it more garlicky, though you can play it by ear. Remember that the strong garlic flavor will cook off when you cook the meat.
-1/2 cup olive oil
-3 tbsp. red wine vinegar
-salt & pepper

-I used to hangar steak which is a great tender cut of meat, similar in taste to skirt steak, our favorite. On the expensive side, but so good. Usually it comes in one steak but for some reason mine unfortunately came butchered into pieces without me realizing when I bought it.
-Marinate the steak in the chimichurri for a few hours.
-Spray a large skillet with non-stick cooking spray and heat over medium high heat
-Add the steak and all the sauce
-It will take approximately 6 minutes per side, but depends on the thickness of the meat and how you like it.
-(The meat can also be broiled, but I find it pulls the flavor out too much and can burn)


I love to eat out, even though I love to make my own delicious food. But sometimes it's just not worth it!! I'd give the place another chance, though, as long as they decide to season their chicken next time!!! Plus, any restaurant that has to ask you if you want complimentary bread 20 minutes after your order is taken, is not on my good list!!!!! 

Now, what should I make for dinner tonight????

Wednesday, December 15, 2010

One Fish Two Fish...

I love WHITE fish, as in Tilapia, Wild Scrod, Halibut, Flounder, Seabass... Tilapia is my favorite to cook, and I don't really ever buy seabass only because it tends to be on the expensive side of things, but it is one of the most delicious of the white fishes out there!!

My first recipe I used on 2 different occasions, one with wild scrod, which I baked, and the other with tilapia, which I grilled. I have this Calphalon Panini Pan which doubles as a panini press, and a grill pan that I use for dairy/fish, or grilling vegetables. It's a great thing to have in your cooking repertoire, and not any harder to store than a frying pan. It's especially perfect if you like to grill, and don't have room for a double stovetop grill pan, or if you are like me and live in an apartment so grilling outdoors is impossible!

The second way I generally like to prepare tilapia is breaded & baked at a very high temperature to get that "fried" look and taste. Tilapia is a very light, mild, and delicate fish so it holds up really well with a breading, and adds a great flavor to it.

*If you are short on time, you can't go wrong with a drizzle of olive oil, fresh lemon juice salt, and pepper. For a simple no-fail addition of crunch, go for slivered almonds on top towards the end of the baking process.*

FYI: The easy way to tell if fish is cooked through is if it easily flakes off

That's it for my introduction, and here goes...

Grilled Tilapia
-2 tilapia filets
-2-3 cloves of garlic, finely minced
-2 tbsp. Earth Balance margarine, melted in the microwave
-salt and pepper
-Chopped parsley (can substitute for dill or basil)

-Heat up grill pan on medium-high, spray with non-stick cooking spray
-Pat the tilapia filets dry on both sides with a paper towel- if not dry, it will not grill well.
-Sprinkle with salt & pepper
-Add the minced garlic and chopped parsley to the melted Earth Balance
-Brush one side with the margarine mixture, and add it seasoned side down to the grill.
-Brush the other side
-Since tilapia is pretty thin, it only takes 4-6 minutes per side
-Sprinkle with more fresh chopped parsley & serve with pesto mayonnaise (just combine pesto and... mayonnaise!!! Proportions to your liking)


Baked Wild Scrod
-2 filets wild scrod, sliced in half across (they tend to come pretty thick)
-Same mixture as above recipe (Earth Balance, garlic, & parsley)
-2 tsp. lemon juice
-Sesame seeds
-Panko crumbs

-Preheat the oven to 400 degrees
-Top the bottom half with some of the margarine mixture, and then lightly brush the top half with the margarine and coat in the mixture of panko, sesame seeds, and lemon zest. Put on top of the bottom half
-Spray the top lightly with olive oil spray 
-Transfer to a glass baking dish and bake for 25-30 minutes until golden brown and cooked through.

Honey Dijon Panko Crusted Tilapia
-2 filets of tilapia
-2 tbsp. seasoned flour (flour, garlic salt & pepper)
-1/4 cup dijon mustard
-2 tbsp. honey
-1 tsp. lemon zest
-1 tbsp. lemon juice
-1 tbsp. chopped dill
-Panko Crumbs + Sesame Seeds mixture

-Preheat the oven to 450 degrees
-Create "dredging station" [the traditional dredging process is usually flour, egg, and breading. The flour allows the egg to stick easily, and the egg allows the breading to stick. However, I like to replace the egg step with flavor. The breading still sticks pretty well]- 3 plates: 
1) seasoned flour 
2) honey/dijon/dill/lemon (zest & juice) 
3) panko+sesame
-Coat the filets in seasoned flour, then dip in the honey dijon mixture, then in the panko mixture, and put into a baking dish or tin
-Spray the tops
-Bake 15-20 minutes, and then flip and bake for an additional 10 minutes
-Top with extra fresh dill & more dijon mustard

Here is a fried version of the above recipe, though for this I split the tilapia filet in half to create an adult version of my favorite kid food---yes, fish sticks!!!
-Here I used basil in place of the dill, and cornflake crumbs in place of the panko sesame mixture (the sesame burns faster, and the panko tends to flake off faster than the cornflake crumbs, which holds up really well to frying) and fried it in a little bit of canola oil for a few minutes per side. Sprinkle with lemon juice.

Go Fish!!!
-E

Wednesday, December 8, 2010

That's What HE Made!

Breakfast Galore!

Sorry for the break, me and Rosie have both been under the weather, but hopefully getting better soon!!! Anyways, today my blog will be dedicated to Avi in honor of our Hebrew 2nd Anniversary, (hence the title of the blog today- get it? That's What "HE" Made- cheesy? I think not!) which falls out tonight & tomorrow, the 2nd of Tevet, zos Chanukah. Aka 2 years ago today, hebrewly of course (well, it's a word now), I was on my way to the wedding hall!!!! Those 2 years spedddddd by to say the least!

Though I basically take charge in the kitchen and food department, food shopping, cooking etc., Sunday morning breakfasts are left up to Avi, who makes a mean French Toast, pancakes, waffles, & eggs (which are also his go-to dinner meal when I am too lazy to make dinner, it happens to the best of us! When Avi is lazy, it's a million bowls of honey nut cheerios. Yes I get the super economy huge boxes after the regular size boxes would disappear in a sitting or two). You name it, Sunday morning comes, he'll make it. Well, actually it basically stops at pancakes, french toast, waffles, and eggs- sorry Av, stick to the griddle instead of tackling noodles again, please! In any event, he is also great at eating everything I put in front of him, though, and he is my toughest critic! Needless to say, mushrooms are no longer in my cooking repertoire. Something about eating a fungus that grew by the trees in his old house. Well obviously those aren't the EDIBLE ONES! It's a battle I lost looooong ago. And here is one time my sister-in-law is NOT helpful. Though I love them both.

Anyways, everyone knows Avi is very creative and handy so he always brings that to the breakfast table. Exhibit #1:
 A heart pancake ala Avi, from a mold which he fashioned out of tin foil. For those of you not so fortunate enough to have this utter talent, go spend $12 on these pancake molds from Bed Bath & Beyond. Or just call Avi, he'll be glad to oblige for a small fee. ;-)

Exhibit #2: Awwwwwwww

For Avi's birthday last year I bought him this Waring Pro Waffle Maker, (which is wayyy cheaper at Costco). Apparently I struck gold, because as you can see in exhibit #2, he's been making waffles for quite some time. Very cute!!! :-) Then, for one of the nights of Chanukah last year, I bought a glass syrup jar, which I broke the first time we used it. Oh well: RIP syrup jar, never again- glass + sticky maple syrup is not a fun combo to clean up. 

Speaking of syrup, here's a vital tip: whether you stack it...
...plate it...

...or set it all out on the table... (is this getting out of hand yet?)

...ALWAYS USE THE REAL MAPLE SYRUP!!!!!!!! It's gotten much more expensive than it used to be, but it's worth it. Leave the sugary, liquidy, fake-maple-syrup behind, and get a bottle of pure maple syrup! (My own tip: I use it in marinades, for chicken or salmon, & the fake stuff just doesn't even come close to being a substitute. It's also great in oatmeal cookies, just swap out a little sugar. So, it's a great versatile ingredient to have on hand in the fridge). You can go for the giant Costco container, or Trader Joe's sells glass jars of maple syrup for a decent price (yes, I dropped and broke one of those too- apparently I don't have luck with glass and syrup).

There are millions of recipes out there for pancakes & waffles, but Avi's go-to "recipe" comes from the breakfast queen herself, Aunt Jemima! I buy the Whole Wheat Blend Pancake/Waffle Mix, which is Pareve (whereas the plain mix is Dairy, just FYI) and you basically just follow the directions on the back of the box, and add egg, milk, & oil. I think the proportions are different for the waffles. This is a great easy way to make pancakes and waffles in a flash, though as Avi says, "it's not just the box. It takes skill & practice"- and patience might I add, because I sure hate making them! He is very methodological (worst word to say) when he makes them. And even though you're using a mix, you can still be creative & add whatever you want. Avi's choice: chocolate chips & cinnamon. Me: blueberries. You can add to the waffles just the same, and the waffle maker is really easy to use (well, what do I know, I never used it). Here is my CRISPY waffle ala Avi (he likes them soft, I like them crispy) with raspberries, blueberries, maple syrup, and granola. I think the only thing it's missing is ICE CREAM!! 

I will share our French Toast recipe, though some may say that there's really no wrong way to make it. The key is just good bread (aka leftover Challah)!!!
Cinnamon French Toast
-Leftover challah
-3 eggs (depends how much challah you are using, but assume 1 egg per 3 slices of bread. It's all relative)
- 1/4 cup milk
-2 tbsp. cinnamon sugar (to make cinnamon sugar I usually use these proportions: 1 tbsp. cinnamon to 3 tbsp. sugar)
-1 tsp. pure vanilla extract

-Whisk all the ingredients together & coat each slice of challah in the egg mixture, and let sit for a minute or two while you heat up the griddle (we have one similar to this by Simply Calphalon) sprayed with a little cooking spray. 2-3 minutes per side, until egg is cooked through.
-Avi likes to sprinkle his with a lot more cinnamon sugar and maple syrup, though I prefer a sprinkle of plain sugar, or a dusting of powdered sugar if you want to get fancy. I also love to eat it with sweet ricotta cheese on the side: mix ricotta cheese with cinnamon sugar, just a sprinkle of orange zest (optional), and you can add a tiny bit of milk just to thin it out a bit- yum! Adjust the proportions to your liking.
    
So as you can see, Avi loves breakfast, and hopefully one day Rosie will enjoy her Tatty's delicacies. As you can see, she already does! Avi made her French Toast for her 1 month birthday. She seems to be enjoying, whether she is sleeping or not! (P.S. she is way cuter now, at 7 months).

So, Happy 2nd Anniversay Av, I love you sooooo much and may we have millllions more Sunday morning breakfasts together (mid-April through January only, of course) for maaaaany more years to come.

I love you to the moon & back^1029832749832520.....!!!!
<3 (it's supposed to be a heart okay???)

Have a great rest of Chanukah, everyone, and in keeping with the Avi theme of this blog, it'd only be appropriate to close with this sequence of Chanukah pictures
Chanukah 2008
 Chanukah 2009
Chanukah 2010

And just because I have to...


E

Wednesday, December 1, 2010

Latkes, Fritters, Pancakes, Patties...

Whatever you want to call them, they scream CHANUKAH!!! Is it just me or did December just creep up on us. Anyways, I love fried food... but I rarely fry at home- I save it for the occasional appetizer order when we go out :-) Tonight was a fried latke experiment for me- it was my first time making potato latkes. However, I decided to make my own spiced up version of the oily Chanukah boring Idaho potato tradition. I decided to make Sweet Potato Carrot latkes with sage & dill, and I lightly fried them in canola oil. I didn't know if they would come out good, but they DID! Dill is SO versatile, I use it in SO many dishes- fish, chicken, all kinds of salads, dressings, and apparently- latkes! Sage is my new favorite herb, because I bought a big package last week to add to my butternut squash soup for Thanksgiving. So, this is just an effort to use it up. It can be strong, and can be left out if it's not your thing.

My second recipe I call zucchini "fritters" and not latkes because they don't need to be exclusively associated with Chanukah! And when I think "latke" I think Chanukah. I first made them in summer after seeing a recipe in Food Network Magazine (I believe it was Ina Garten's), so my version is a spin on that. They can be made with Parmesan cheese (for that extra added kick), or without, to work them into a meat meal. Shocker- a bunch of dill! Plus, I bake them with a panko crumb topping, so that they get extra golden and crispy, without having to fry them.

Sweet Potato Carrot Latkes with Sage & Dill
-4 small-medium sweet potatoes
-2 small carrots
-1/4 cup panko or cornflake crumbs
-1/2 cup flax meal (preferred brand: Bob's Red Mill. Side note: this flax meal can be bought for a great price at Trader Joe's. It's similar to Wheat Germ, but it's gluten free. I use it in muffins, on top of roasted vegis such as brussel sprouts, combine it with panko or cornflake crumbs for breaded fish or chicken, even sprinkle some into yogurt. It is a great thing to keep on hand, and lasts a while in the freezer. It doesn't lend an enormous amount of flavor, yet it adds texture and a lot of health benefits). You can substitute with flour or more crumbs if you don't have.
-3 eggs
-3 tbsp. garlic powder
-2 tbsp. chopped dill
-4 sage leaves, finely chopped
-1 small onion, diced
-salt and pepper
-Canola oil, for frying

-Grate the sweet potatoes and carrots in a food processor, and combine with the rest of the ingredients in a large bowl. The best way to combine everything is with your hands!! (FYI you can use less panko/flax for a less dense latke).
-In a large saute pan, heat 2-3 tbsp. of canola oil, just enough to lightly coat the bottom of the pan. Form patties and fry 2-3 minutes per side, until cooked through.
-Set the latkes on a single layer on paper towels.

-Serve with garlic dill mayonnaise with a sprinkle of fresh lime juice, or apple sauce to play on the sweet.
-Yield:  10 latkes

Zucchini Fritters
-3 large zucchinis
-1 tsp. Kosher salt
-1/4 cup chopped fresh dill
-2 tbsp. dried parsley
-1 tbsp. garlic powder
-1 tsp. lemon zest
-1 egg
-1/4 cup flax meal
-1/4 cup panko or cornflake crumbs
-1/4 cup Parmesan, optional (lessen the amount of crumbs used if use Parmesan, because it also works as a binding agent)
-Pinch of black pepper

-Preheat oven to 425 degrees
-Grate the zucchini with a box grater or in a food processor, put into a colander with a tsp. of Kosher salt, and let sit for 15 minutes. This is an important step because it drains the moisture out of the zucchini. Without this step, the fritters will be soggy.
-Once zucchini is drained, combine all the ingredients into a bowl and mix. Do not add extra salt, the salt from the draining process is enough.
-Obviously the fritters can be fried in oil, but I opt to bake them. Coat the fritters on both sides with panko crumbs, and lay the fritters on a baking sheet sprayed with olive oil spray. Then, spray all the fritters from far with olive oil spray (so that you don't spray the panko crumbs off the fritters), or drizzle with olive oil (this is when those squeeze bottles come in handy!). Bake 15 minutes, then flip them, and bake for an additional 10-15 minutes.

-Serve with tomato sauce, or ricotta cheese with lemon zest & dill.
-Yield: 4-6 fritters
[my fancy dishes]

Now all I need is a jelly donut & my Chanukah will be complete. Zomicks here I come!
Happy Chanukah!!!
E

Monday, November 29, 2010

Israeli Couscous

Not one, not two, but THREE ways to make this side dish. I only started buying Israeli couscous recently; It came as a side dish to one of my 8 nights of chicken dinners post-baby! Yes, 8 straight nights of chicken. I assure you, I couldn't eat chicken for a while after that. Avi & I both loved it, so I started buying it. It's a wheat-based pasta, much larger than traditional fine couscous. There are many brands, but I opt for the Osem 21 oz. plastic container -with a red lid (I read somewhere that Osem was the first brand to make Israeli couscous, asked by Ben Gurion himself- I actually just validated that with the trusty Wikipedia :-). Sometimes it comes in boxes, with a plastic bag of the couscous inside, which you then have to reseal with a rubber band or what not, so this plastic container is just very convenient. FYI, Trader Joe's also sells boxed Israeli couscous! At a great price too. $1.99 I believe, and they provide the best way to prepare the couscous- toasting it as opposed to straight up boiling, which gives the couscous a much better flavor, and I highly recommend doing it this way. Basically, you add a tbsp. or 2 of olive oil to the bottom of a saucepan, add the couscous, essentially toasting, or "sauteing" it for 5 minutes. Then you add boiling water (I use a plug in kettle) gradually (follow whatever water to couscous proportions the box suggests), and salt, and simmer for 8-12 minutes. So here are 3 variations on "spicing up" this otherwise bland grain. 

1) Confetti Pesto Israeli Couscous
-1/2 a red onion, chopped
-1 cloves garlic, minced 
-1 zucchini, chopped small
-3/4 cup chopped eggplant
-1 carrot, chopped
-Homemade or store bought pesto (basic recipe below)

-Saute the onion and garlic in olive oil until onions are translucent. Add a pinch of salt & pepper
-Add the zucchini and eggplant & saute only a few minutes until softened. Add to the couscous
-Add the carrot
-Toss the couscous & vegetables with homemade or store bought pesto (I like to make my own, it's so easy especially in the mini food processor: blend 2 cups packed basil leaves, 2 cloves of garlic, 1/4 cup walnuts or pine nuts, 1/4-1/2 cup olive oil, salt and pepper to taste)


 2) Israeli Couscous with Shallots & Wilted Spinach
-2 shallots, chopped
-2 cloves of garlic, minced
-3 cups chopped fresh spinach

-Saute the shallots and garlic in olive oil on medium-high heat until browned, about 5 minutes
-Add the spinach and a tsp. of salt (helps the wilting process)
-Saute until just wilted. You don't want to wilt it too much that the spinach loses its green color.


3) Whole Wheat Israeli Couscous with Balsamic Sauteed Vegetables
**I was excited to find Gefen (100%) Whole Wheat Israeli Couscous, but to my dismay, when I cooked it, kind of tasted like Matzah Meal!!! Since I didn't feel like having an 8th day of Pesach flashback for dinner, I decided to do whatever I could to mask that matzah-y flavor! 

-Saute 1 small onion & 1 clove of garlic in a tbsp. olive oil. Transfer to a glass bowl, and add 1.5 tbsp. olive oil and 2 tbsp. balsamic vinegar and set aside.
-In the same pan, saute 1 chopped zucchini & a handful of chopped eggplant
-Add everything to the couscous & toss all together
-Add 1 tbsp. fresh chopped dill
-Salt & pepper to taste
-Let sit for at least 20 minutes before serving (refrigerate, or not)


Like any kind of pasta, Israeli couscous on its own is, well, BORING!!! If you don't have a lot of time, tossing the cooked couscous with a little bit of Earth Balance, salt & pepper, and dried parsley for some green color can liven it up just enough to accompany any fish or meat dish, in no time. Or, use your imagination & add practically whatever vegetable you have on hand, sauteed or not, frozen or fresh. It's extremely versatile & can be prepared in no time at all. Just remember to take the extra few minutes to toast it beforehand! 

E

Sunday, November 28, 2010

Thanksgiving

I hope everyone is "recovering" from Thanksgiving... Ha! As if we need an excuse to eat a big meal, to loosen our belts, etc. In QC, all the professors always say corny jokes before Thanksgiving about the weeks of prep that go into it, and that they should all expect us back after the weekend having gained a few pounds. Please, they have nothing on our 3 day Yom Tovs, and weekly Shabbos meals whipped up on Friday!

Our Menu
-"Orange" soup with sage served with roasted garlic & sage crostini, ala me :-) (see below)
-Fresh cranberry sauce (mom)
-Sweet potatoes with fresh rosemary (brother Gavi)
-Cranberry Apple Crisp (Shifra)
-Mashed potatoes with caramelized onions & chives (mom)
-Herb & Apricot Turkey (mom & dad)
-Minute Steak Roast with basil, garlic, & tamari sauce (mom)
-Roasted Green & Purple Asparagus with Balsamic Reduction (I made the reduction: bring 1 cup of balsamic vinegar with 1-2 tbsp. sugar to a boil, then let simmer for 20-30 minutes until reduced by more than half, and syrupy. It definitely doesn't smell pleasant but is delicious on vegetables or even chicken!)

-Roasted carrots (mom)
-Flaxed Brussel Sprouts (sister Shifra)
-Apple Cake (mom)
-Flourless Chocolate Cake (me)
-Pumpkin Cheesecake (Shifra)
-Pumpkin Pie (Shifra)

I'm sure I left some things out but nevertheless, everything came out great, and a perfectly carved turkey thanks to my father!

Anyways, we had an amazing Thanksgiving meal, collaborative effort by my parents, brother, sister, and myself! I made the soup (see previous post about soup, it was that recipe) but this time I made it with 2 lbs. of peeled, cubed butternut squash, & then realized that it probably wouldn't be enough for everyone, so I added 4 sweet potatoes & 3 carrots. I garnished each bowl of soup with a sage leaf, because I put sage into the soup itself. And- I took a picture this time!

I also made Roasted Garlic & Sage Crostini:
**Roasted garlic spread on bread, if you've never had it before, is AMAZING. 
-My mom roasted elephant garlic (huge cloves), but you can do this with regular garlic as well. If using elephant garlic, go ahead and peel the big cloves, put in foil, drizzle olive oil & wrap up. Roast for 30 minutes on 400 degrees. If using regular garlic head, cut horizontally across to form 2 halves, sprinkle with olive oil, and wrap in foil & roast. It's just more tedious to individually "unwrap" each clove. This makes it easy to scoop out once roasted.
-Once finished, let cool. scoop out all the garlic into a bowl. Add 3 finely chopped sage leaves and mash with a tbsp. of olive oil.
-Spread onto toasted slices of ciabatta bread.

I could have eaten the entire plate. Too bad we had 9 other people I had to leave for!!!


-Obviously the soup, asparagus & crostini was not the crux of the hearty meal (-turkey!!!-), it definitely added to it! I just wanted to share some of the highlights of our meal!

Hope everyone had a nice long weekend full of food food food!
Good night,
E

Wednesday, November 24, 2010

Power Up!

If anyone has ever gone to Sacred Chow in the village, may have seen their "Power Bowls" on the lunch menu, my mom's favorite. Now, I won't say "you must try it" (the restaurant, that is), because it isn't for everyone. It's vegan, but delicious nonetheless, in my opinion. The avid carnivore may shrug their shoulder, but it is great (I recommend the Orange BBQ Seitan Sandwich)! Anyways, the "power bowl" consists of 1 protein, 1 grain, and 1 vegetable. I decided to create my own "power bowl" for dinner tonight (albeit a meat version), in "honor" of Thanksgiving:

-Protein: Herb Turkey Meatballs with Cranberry Sweet & Sour Sauce
-Grain: Brown Basmati Rice Blend
-Vegetable: Garlic Sesame Wilted Kale

Herb Turkey Meatballs with Cranberry Sweet & Sour Sauce
-1 lb. ground turkey
-1 egg
-1/4 cup ketchup
-2 tbsp. mayonnaise (my secret moist maker!)
-1/4 cup cornflake crumbs (I usually just estimate, sometimes I add more if I need)
-4 sage leaves, finely chopped
-7 basil leaves, finely chopped
-3 cloves garlic, minced
-1 onion
-1.5 cups finely chopped kale or spinach (or frozen spinach, thawed & liquid squeezed out)

-Prepare the rice according to package directions (I use Rice Select Whole Grain Royal Blend. Trader Joe's Brown Rice Medley is an excellent choice as well). Make sure to do this first, because it takes ~45 minutes for brown rice to cook.

-Prepare the cranberry sweet & sour sauce (adapted from Spice & Spirit):
-In a bowl or measuring cup, add a can of jellied cranberry sauce & break up with a fork, and then put into a 3 quart saucepan with 1 cup ketchup, 1/2 cup brown sugar, 4 tsp. lemon juice, & 2 tbsp. water. Let simmer covered. Add a little more water if you want it thinner.

-Saute the onion & garlic until golden, and add the kale or spinach until wilted. Let cool.
-In a large mixing bowl, beat the egg, add ketchup, mayonnaise, cornflake crumbs, sage & basil (they impart amazing flavor into the meatballs) & kale mixture (make sure it's not too hot off the stove or it can "cook" the egg & the meat). Add the ground turkey and combine with your hand, just until incorporated (don't over-mix). Let sit for 10 minutes.
-Heat up a large saute pan with vegetable oil (thin layer). Form the meatballs & add to the pan. I make them fairly small, and I get around 25-30. Saute 3 minutes on medium-high heat and then flip each meatball and saute other side for 3 minutes. Then cover the pan and let cook 10 minutes on medium-low.
**This method makes a golden "crust" on the meatballs. If you don't have time for this step, just add the meatballs directly to the sauce & simmer for about an hour**
-Stir the sauce, & add more water if it's lumpy. Add meatballs to the sauce, and let simmer for 10 more minutes. **You can also just serve the meatballs directly out of the saute pan & pour the sauce over them**


Garlic Sesame Wilted Kale (you can make this all at once -onion, garlic, kale- & reserve some for the meatball mixture. Kale can be substituted for spinach here too)
-1 bunch of kale, roughly chopped
-1 onion, chopped
-4 garlic cloves, finely minced
-Pinch of salt
-2 tbsp. sesame seeds
-1 tsp. sesame oil

-Saute onion, & garlic in olive oil or cooking spray. Once golden, add the kale (or whatever greens you use) & a pinch of salt. When slightly wilted, add the sesame seeds & the the sesame oil (you can use the sesame oil to saute in, but I like to add it right at the end)

-Put the rice in the bottom of a dinner bowl, and add some meatballs on the right side, & the kale mixture on the left side. If that's not a power bowl, then I don't know what is!!!


I've always grown up on hearty multi-course dinners thanks to my amazing cook of a mom (i.e. salad, a protein, a vegetable, & a starch/grain), and I try to cook the same way, as best as I can, because that is what I am used to. I like a variety of textures on my plate, so this "power bowl" is just a new spin on the variety of a meal- layered in a bowl as opposed to portioned out onto a plate! I hope you enjoy.

Be creative & create your own power bowl
E

Monday, November 22, 2010

Soup

Why, when I think of soup, does the "Soup Nazi" episode of Seinfeld immediately come to mind!? I don't even like Seinfeld! Anyways, I hope my soup is that good, though I wouldn't want the same status :-)

I love making soup, I find that it the easiest thing NOT to screw up. Just need good base vegetables (onion, celery, and carrot is considered the "trilogy"), water (or broth), and salt & pepper. Whether it is a pureed soup, or a hearty one, you just can't go wrong. "Invest" in this handheld immersion blender which will make your pureeing job that much simpler. There are more hi-tech ones (like this one by Breville- pro: cordless, con: $$$), but I have found that this one works just perfectly. Plus it's a breeze to clean, the bottom part disconnects with the push of a button. And, with the price of $29.99 (don't forget your trusty 20% off coupon!), you can spring for 2, one for meat as well. I don't have concrete recipes for any of the soups I make, but they basically all involve the same process, just using different vegetables each time. Typically any vegetable you think of can be blended into a delicious soup.

Two weeks ago, just as the weather was really turning, as I was shopping for my produce, I decided to buy wares for different soups that just kept coming to my mind. Soup of the day? Yes, I literally made a different soup everyday! So I will go through my week, or so, of soups. Unfortunately, I didn't take pictures of my soup- I DON'T KNOW WHY!!!!!! I eat with my eyes first. But, sorry, just imagine that they all looked silky good, and tasted even better...

Basics
-Onion
-Fresh garlic
-Celery
-Carrots
-S&P, and dried Italian seasoning (blend of oregano & thyme)
-Low sodium vegetable broth (preferred brand: Trader Joe's)

1) Monday: Cauliflower Soup
-One onion
-Olive oil
-Salt & pepper
-2 cloves of garlic, minced
-1 head of cauliflower, cut into individual florets (the smaller you cut them, the faster they'll cook)
-2 big red potatoes, peeled & cubed
-Vegetable broth & water

-Saute one onion in a few tbsp. of olive oil until translucent & then add the garlic
-Add the seasonings salt (1/2 tbsp.) pepper (1/2 teaspoon) & 1 tsp. italian seasoning (tip: it's important to season in every step of the process; just adding s&p at the end won't suffice)
-Add the cauliflower florets & potato
-Add 4 cups of broth & 2 cups of water (better to add less at the beginning, & add more if it's too thick once pureed; it's easier to thin a thick soup, then to thicken a thin soup!)- you can use all water or all broth- the proportions are up to you.
-Add a little bit more salt & pepper
-Bring to a boil, and then turn to low heat until vegis are soft enough to puree with the hand blender.
-Add more water if needed, or you can add milk, or any milk equivalent if you choose. I never use anything but water or broth, I find it's good enough without!

**The versatility with this soup (& any soup for that matter) is that you can substitute the cauliflower with broccoli, for broccoli soup. The potato just acts as a thickening agent**

2) Tuesday: Roasted Potato Leek
-3 leeks, white & light green parts only
-4 cloves garlic
-8 medium-large Yukon gold potatoes (or a 2 lb. bag)
-Salt & pepper
-6 cups of liquid: vegetable broth + water

-Cube the potatoes, toss with olive oil & garlic salt and roast at 450 degrees for about 20 minutes. That extra step really makes the soup taste better, but you can do without if on a time crunch.
-In the meantime, slice the leeks down the center, and then chop up. Soak in water and a tbsp. of vinegar (helps release the sand- leeks are notoriously sandy/dirty)
-Once drained, saute the leeks in olive oil (rule of thumb with the olive oil is use just enough to thinly coat the bottom of the pot), and add the garlic
-Add the roasted potatoes, salt & pepper
-Add the liquid- the same rules apply- the less the better, and add more later
-Bring to boil & then lower heat to medium-low
-Cook about 30 minutes, until the vegis are all soft enough to puree

3) Wednesday: Butternut Squash
-1 onion, chopped
-1 stalk of celery, chopped
-2 small carrots, chopped
-Shortcut!!! : 2 lbs. peeled & cubed butternut squash (Trader Joe's has this, & at a great price)
-2 cloves garlic, minced
-Salt & pepper
-6 cups liquid
-7 fresh sage leaves

-The process is the same as above- saute all the vegetables, add the butternut squash, season throughout, & then cover with liquid and cook until soft
-As far as the sage leaves though, I love the flavor of sage with butternut squash- it is very apropos for this time of year, especially. You can add the sage leaves whole at the beginning with the onions, and then fish them out afterwards, or you can chop them up and add them with all the rest of the vegetables. Either one is fine.

4) Thursday: Roasted Tomato Basil
-1 onion, chopped
-1 stalk celery, chopped
-1 carrot, chopped
-1 tbsp. dried Italian seasoning
-1 lb. plum tomatoes
-Balsamic vinegar
-6 garlic cloves, sliced
-1 can cannellini beans (white beans), drained
-1 container of Pomi Chopped or Stewed Tomatoes (I recommend using boxed tomatoes. They sell them at pretty much every supermarket. I try to stay away from canned tomatoes, studies have shown that the acid from the  tomatoes mixed with the metal can is not a good combination).
-1/2 cup marinara sauce
-2 tbsp. tomato paste (I use the Israeli brand that come in little peel back containers, 4 connected)
-2 cups fresh basil leaves, rinsed well

-Preheat the oven to 400 degrees. Cut the tomatoes in half the long way, and scoop out the seeds. Toss with olive oil, salt & pepper, and lay on a baking sheet cut side up. Drizzle balsamic vinegar over the tomatoes, and put garlic slices in each tomato cavity.
-In the meantime, saute all the vegetables, add Italian seasoning, salt & pepper.
-Add marinara, boxed tomatoes, and tomato paste
-Add the roasted tomatoes
-Cover all the vegetables with water + broth (whatever combination you prefer)
-Mash the beans with the back of a fork until it forms a sort of paste (this thickens the soup without adding any extra fat or carb)
-Bring to boil, and then lower the heat and cook for 20 minutes until everything is soft. Add the basil & the beans, cook 10 minutes, and then puree.

5) Friday: Meat Soup
This is basically a basic chicken soup recipe made with flanken instead. Ok, it's not all that original but nonetheless good.
-2 zucchinis
-2 carrots
-1 onion, quartered
-2 stalks celery
-1 sweet potato
-1 large red potato
-A few sprigs of fresh dill
-Chunks of flanken, trim the fat as much as you can
-Cover all the vegetables with water, and a little salt (I didn't use pepper, or a lot of salt because I made this with the plan of pureeing some for Rosie--> she LOVED it)
-I let it cook for about 3-4 hours.

There are so many variations for soup. I made zucchini soup this past Thursday, recipe thanks to Naomi's mother in law!!! It was a hit, but again, you don't need recipes to make delicious soup. You have all the basic tips & ingredients, so just EXPERIMENT! Add any vegetable you like.. well, I'm not sure if bell pepper soup would be a success, but who knows!

Slurp away,
E

Saturday, November 20, 2010

Potato Pahtato!

What a cliche name for a  blog post about potatoes?! Anyways, sorry for being m.i.a. for a couple days. My post today will be about.. POTATOES!!!!!!!! We lovvvvve any form of potatoes - mashed, roasted, fried, boiled... (as a matter of fact, Rosie just had her first run-in with homemade sweet potato puree last week and it was a succes!) Our favorite is sweet potato (chunks, fries, chips). Here is the low down on some varieties of everyone's favorite starch!

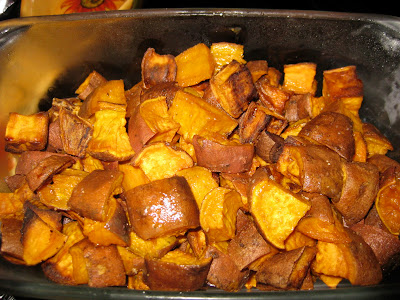
1) Sweet Potatoes= also called yams, really hearty and not only for Thanksgiving!!! Known to be orange, a lot of people don't know that there are white and "pink" sweet potatoes. Anyways, here is a really simple way to make delicious roasted sweet potatoes:

-Cut each sweet potato in half the long way. Then cut each half the long way in the middle (can make 2 long cuts, depends on how big the potato is), and then crosswise to make even chunks (try and make them all the same size, to insure even cooking). OR cut in fries.
-Toss all chunks with olive oil, salt & pepper, and freshly minced garlic (figure 1 clove per 3 potatoes)
-Roast at 450 degrees on baking sheets sprayed with olive oil spray for 45 minutes to an hour, tossing potatoes halfway thru cooking, and rotating the pans.
-Sprinkle with garlic salt as soon as it comes out of the oven
-Serve with garlic mayonnaise (don't knock it till you try it!)

Sweet potatoes also make for a delicious soup, but that's for another post :-)

2) Confetti Potatoes/Fingerling= Trader Joe's sells a little bag of mixed potatoes that they call "confetti potatoes." It's a mix of mini Yukon Golds, purple, red, & fingerling potatoes. Fingerlings actually look like- finger shaped potatoes! For these roasted chips I used the Yukon golds & the purple potatoes. Terra Blue Chips, anyone?? Just cut the potatoes in chip shapes, toss or brush with olive oil, and sprinkle with salt & pepper. Roast at 425 degrees for about 30-40 minutes, flip them halfway through, and rotate the pans (same method as above). Sprinkle with salt when you take them out of the oven. Make chips out of any potatoes. I just made sweet potato chips for Shabbos- yummm. 


 3) Red Potatoes= good for use in any of the top methods, but also can be used for this deliciously simple potato salad. I used to screw up all the potato salads I'd ever make, so I gave up for a while. Avi is obsessed with Bagel Boss potato salad, so eventually I sucked it up and made the attempt once more, and believe it was a success:
-9 red potatoes, cut in chunks & put in a pot of water, bring to a boil. Boil for a few minutes until pierced easily with a fork, not too soft though.
-Once cooled, add 1/2 cup of mayonnaise, 3 tbsp. dijon mustard (more if you'd like), and a sprinkle of garlic salt.
-Finish off with chopped dill & scallions. Refrigerate until serving time
(I once made this with roasted, instead of boiled, red potatoes and served it warm, it was delicious!!)

-I don't often use Idaho potatoes, I find they are very starchy and gritty. For mashed potatoes, or regular potato fries I recommend using big Yukon Golds:
-Bake at 425 for 25 minutes

-Get out your graters or food processors and start working on those Chanukah latkas!!!

Till next time,
E  

I have plenty more potato recipes, but will save them for a different time!

Wednesday, November 17, 2010

The Bare Necessities

This post will be different than the others; instead of posting a recipe, I will focus on the things I use in the kitchen (gadgets) that I can't live without! Good knives (paring, santoku, filet) are a given (I recommend this Farberware 22-piece set), but here are some of the tools I use pretty much on a daily basis:

1) Microplane= aka a fine grater. Most generic box graters do not have a good fine grater side, which can be used to grate so many things- typically thought of to zest citrus, it can also be used to finely grate a clove of garlic into almost a paste-like consistency. It is also known for grating fresh Parmesan, or other hard cheeses. I use this so often for adding lemon, lime, or orange zest into my cooking, which boosts the flavor of almost anything, savory OR sweet. Click here to buy!

2) Salad Spinner= if you don't already have one, as it is a pretty common gadget to own, GET ONE NOW!!! It's a "one stop shop" for washing, drying, and storing the clean lettuce. It does a great job at "spinning" the water out. Once dry, pour out the water, lock the top knob in place, and store in the fridge.

3) Mini Food Processor= so I only got this one recently, and I wish I got it sooner! I got the Cuisinart Mini Prep Food Processor to puree homemade baby food- for an amazing price of $30 at Costco. Needless to say, it has made baby food making EXTREMELY easy and convenient, as I store my regular 7 cup size food processor on top of my pantry and it feel like it weighs more than Rosie. So, I only use it when Avi is home to get it down for me! Plus it's such a hassle to wash. This mini 3 cup food processor sits right on my counter, has one blade and 2 settings (chop & grind- just different directions of the blade).. I discovered so many more uses for it aside for the baby food. I used it to make pesto, chop nuts (I was lazy), and also used it to blend up my balsamic vinaigrette (see previous post)! The most important part- it's a breeze to clean up! Click here to see it!

4) Kitchen Shears= I've been through a few kinds of kitchen scissors and these Kuhn Rikon are by far the best, from my experience. They have many uses, from simply cutting open packaging, to trimming fat off chicken! The cool thing about these, is that they come in different colors, so you can buy a red one for meat and a green one for Pareve, etc.

5) Tongs= the uses for tongs are endless. No need for anything fancy, these from Crate & Barrel work just fine, for a great price.

6) Good Mixing Bowls= I use these Pyrex mixing bowls for Pareve & these Oxo stainless steel mixing bowls for Meat, which also come in dark gray. The Pyrex are great because they are sturdy, microwave/oven safe, and you can prepare in them, heat food up directly in them, and store in them. They are even "nice" enough to serve in. I love the Oxo stainless bowls because they are sturdy and have a rubber no-slip bottom. (On The Next Iron Chef, one of the contestants had one of these Oxo bowls on the stove and accidentally melted it, not realizing!- so they are NOT oven safe!)

7) Squeeze Bottles= these bottles are great to have on hand for condiments you use often. I use them for olive oil and balsamic vinegar. It's much easier than lugging the Costco size container every time I need a squirt of oil. I also keep dish soap in one. They definitely make my cooking time easier. 

8) Glass Storage Containers= I like to store my food, especially when hot, in Pyrex Storage or Snapware Glass Lock Storage containers. Save the plastic containers for when you need to take food on the go, or lunch to school/work. The Snapware is great, and seals airtight. 

9) Mandoline= okay, I don't actually have a mandoline but I have been meaning to get one for some time now. I like to make homemade potato chips (baked) and it is very tedious, and takes a while to cut the thin rounds. Same goes for cucumber salad, or even shaved fruit. I hear this Oxo Mandoline is great. Maybe I'll get one soon :-)

Well, everyone has their own tools and gadgets, as well as shortcuts for doing things. These are mine, and I hope I have given some "kitchen smart" insight to all you reading!!!!

Happy Cooking,
E

Tuesday, November 16, 2010

2 Ways To Eat...

KALE!!!!!!!!! Kale, which resembles spinach, is actually in the cabbage family along with cauliflower, broccoli, & brussel sprouts. I've only recently discovered it this year and we absolutely love it (to the point that Avi asks for it). My go-to cooking method for kale used to be sauteeing, the same way you'd wilt any greens, with garlic, salt, and olive oil. It got boring, and just wasn't appetizing after a while. It was then that I discovered "kale chips" in Good Housekeeping magazine, and I have been making it ever since, and kale has become a staple in my fridge. 

As most of you may know, I am hooked on the Food Network. Aarti Sequeira won "The Next Food Network Star" and on one of her episodes of "Aarti Party," her new show, she made "Massaged Kale Salad"- I had to try it just because of the name! So I made it, and loved it. I liked the fact that I was eating the kale raw, getting the full amount of nutrients it has to offer, as opposed to cooking it, which depletes some. Kale is a great source of vitamins K & C, and very rich in calcium. Anyways, I put my own spin on Aarti's massaged kale salad, with my own dressing concoction. Once dressed, it can be eaten even the next day and doesn't get soggy.

Don't be afraid of kale, it tastes and can be used/prepared just like spinach.

1) Kale "Chips"
-Preheat the oven to 350 degrees
-Fold each kale leaf and cut down the center, cutting out the thick rib. Then, cut the leaf into ~4 sections
-Wash and dry the kale very well (tip: the dryer the better; wet kale will sog up in the oven as opposed to crisp= use a salad spinner)
-Lay the kale out onto 2 baking sheets (one big bunch of kale usually yields 2 baking sheets worth), in as single of a layer as possible (some overlapping is okay)
-Toss the kale with olive oil, & a little garlic salt (the kale wilts down A LOT, so a little salt goes a long way)
-Cook for 15 minutes, usually not longer or it will BURN!
-Eat with your FINGERS! :-)

2) Massaged Kale Salad with Balsamic Vinaigrette 
-1/2 a bunch of kale
-1/2 a mango (I just realized mango has been in the majority of my recipes so far!)
-1/4 cup chopped candied nuts (walnuts, pecans, almonds= tip: you can make your own by glazing nuts in 1/4 cup of sugar in a saute pan until it gets syrupy- thank you M for that tip!!! Make a lot and store for snacking!) 
-3 tbsp. toasted sesame seeds

-Cut out the ribs, and cut the kale into strips (I usually get 6-8 cups of kale strips from 1/2 a big bunch)
-In the bottom of a big glass bowl, squeeze about a tbsp. of lemon juice. Add 1/2 the kale, and literally MASSAGE it! Once it is slightly softened, add the rest and massage more. 
-Add the mango, nuts, and sesame seeds & toss all together with dressing:
Balsamic Vinaigrette:
-1 shallot roughly chopped
-3 tbsp. fresh lemon or orange juice 
-1 tsp. lemon or orange zest
-3 tbsp. balsamic vinegar
-1.5 tbsp. red wine vinegar
-3/4 cup olive oil
-1 tbsp. low fat mayonnaise
-Salt & pepper, to taste

-Blend all ingredients, add olive oil and mayonnaise last, and blend
(Dressing turns out the best when made in blender or food processor)


(Another good point about kale is that since it is a hearty green, it lasts a while in the fridge. I usually buy 2 very big bunches at once, double bag them, and it can last in the fridge for like a week+. This way, I can use it more than once, in different ways for many dinners)

GO-GET-KALE!!!!!!!!!
(P.S. for all you 5-townsers, Gourmet Glatt has the best kale)

E

Monday, November 15, 2010

The Unknown Grain...

Now, most of you probably will read this post and say "what??" because I am writing tonight about Wheatberries, a grain most people never heard of. Well, it is similar in taste to brown/wild rice, but it is a grain. It has a great crunch to it, and makes for a great cold, or warm side dish. I first tried it from the Mauzone take out counter a few years ago (an extremely oily version to say the least), and just recently read about the health benefits of wheatberries on an email I received. It is a tremendous source of fiber and provides a whole lot of nutrients, as it is a whole grain- it is actually the whole wheat kernel, which consists of the bran, germ, and endosperm. Okay, I'll leave nutrition 101 and get on to the recipe. I haven't seen wheatberries in any of the Kosher supermarkets, so I buy it in the bulk section of the health food store (i.e. Wild By Nature in Oceanside, NY). I store it in a plastic container in the freezer.

Wheatberry Salad  (my spin on Ina Garten's recipe)
-1 cup hard wheatberries
-1/2 a large (or 1 small) red onion, finely chopped
-3 tbsp. balsamic vinegar
-6 tbsp. olive oil
-3 scallions (the green parts)
-1 carrot, chopped
-1/2 mango, chopped
-2-3 tbsp. chopped fresh dill

-Boil up 3 cups of water, salt the water, and add the wheatberries
-Cook with the cover vented (half on/half off) for 45 min.-1 hr. It should be slightly crunchy but not too hard
-In the meantime, saute the red onion (can use shallots instead) in 2-3 tbsp. of oil. Once translucent, take off the fire and add the rest of the oil and the balsamic and combine. Set aside.
-Drain the wheatberries and let cool before adding the remainder of the ingredients.
-Add the carrots, dill, mango, and scallion greens (you can add whatever you want!), and then add the onion/oil/balsamic mixture and stir everything together.
-Add salt and pepper to taste, if needed.

This salad can be served cold, or warm, and the longer it sits in the dressing, the better it tastes! It's addictive- but there's nothing to feel guilty about!

Embrace your healthy side  :-)

E