Brussel sprouts are a completely underrated vegetable. They can come out bitter if not treated correctly, and are also often overcooked to the point of no return, resulting in mushy, brown remnants of what were once beautifully green mini cabbages (if not cooked correctly, that is). Though there are many ways to cook them, here is one of my favorite ways, I call it a "flash braise" because of the addition to water to the hot pan, allowing the brussels to absorb it, cooking it quickly without sacrificing many nutrients. After all, steaming can be, well, boring. I infuse the brussel sprouts with garlic, lemon juice, and lemon zest, just for a little hit. Don't forget to season well with salt and pepper or you will fall victim to the awful, under-seasoned vegi. This method can really be used for any green vegi (string beans, snap peas, asparagus, kale). So quick and easy, healthy, and goes alongside practically anything. Even tofu (stay tuned for my next post which will be some killer tofu recipes. [Though it may actually kill some of you to try them, and those of you know who I am referring to!!!!])
Lemon-Garlic Brussel Sprouts
-1 lb brussel sprouts
-Olive oil
-1 tbsp. lemon juice
-2 tbsp. finely chopped flat leaf parsley
-4 cloves finely minced garlic (roughly 1-1.5 tbsp. or so)
-1.5 tsp lemon zest (from about half a lemon)
-Water
-Cut the very ends of the core off each brussel sprout (dont go too deep though, otherwise will fall apart). Trim the outer leaves, if they are bruised, & slice each sprout into about 3 or 4 slices, depending on their size (lengthwise).
-Soak for a while in water with a capful of vinegar in a salad spinner. Drain, rinse, and spin dry well.
-Heat some olive oil in a large pan over medium heat. Add the brussel sprouts, stir to coat with the oil, cook 1 minute. Season with salt and pepper.
-Slowly add 1/4 cup of water, and let saute until the brussel sprouts are tender, and the water evaporates (5-6 minutes).
-Stir in the parsley, garlic, lemon juice, and some of the lemon zest (leave some for serving), and saute 30 seconds-1 minute until the garlic is pretty much cooked and becomes fragrant. Season again with salt and pepper if needed.
-Transfer to a serving dish, and sprinkle with the rest of the lemon zest.
-Immediately before serving, top the sprouts with some lightly toasted slivered almonds (optional). They give the brussel sprouts an unexpected crunch (Not shown in picture).
Try this side for Thanksgiving, it wont disappoint.
E
Tuesday, November 22, 2011
Thursday, November 3, 2011
1 Filling... 3 Ways
This recipe I made quite a while ago, but it is so versatile for so many things. It's a spinach/onion/cheese filling, & I've made it in mini raviolis, mini quiche cups (both courtesy of wonton wrappers), & knishes. Its SO simple, and easy.
Filling
-In a large saute pan, saute one large onion with a drizzle of olive oil, salt & pepper
-Let it brown for a few minutes & add in 3 cloves of finely minced garlic and continue to saute, adding more olive oil if necessary (if the pan gets dry).
-Chop up a 16 oz. bag of fresh spinach (or about 2-3 cups frozen spinach, thaw and squeeze out)
-Add it to the pan and cook until wilted
-In the meantime, crack an egg into a bowl and whisk
-When the mixture cools, add it to the egg
-Add 1/4 cup parmesan cheese, & 1/4 cup of Panko crumbs or cornflake crumbs, and a tbsp. of light mayonnaise
-Season with garlic salt, pepper, nutmeg
-To make the raviolis, or the quiche cups get a package of Nesoya wonton wrappers (usually in the refrigerated area of the grocery store. There are frozen brands but they aren't as good).
-For the quiche cups, prepare a 12-cup muffin tin (you might need more than one pan). Place a wonton wrapper in each, it doesn't have to be perfect, just lightly press the center down. Lightly spray each with cooking spray, then add the filling. You don't close them, so you can add a tbsp. or more of filling. Bake at 375 for 20 minutes or until the edges are browned and the inside has set. They freeze well also!
-For the raviolis, preheat the oven to 375 degrees. Spray a foil-lined sheet pan. With a little bowl of water, rub the edges of the wonton wrapper, for sealing. Place a heaping teaspoon amount of filling in the center of each wrapper, and fold as you wish. You can make triangles, or follow the instruction on the back of the package. I made little "envelopes." Bake for 15 minutes, serve with tomato sauce.
The third way I used this filling was in knishes. Just roll out a sheet of puff pastry with some flour, it can be in an oblong shape, doesn't have to be perfect. Fill with the filling, and pull the edges of the pastry up & pinch together. Brush with egg wash, & sprinkle with Italian seasoning and sesame seeds. Bake at 400 degrees for 20-25 minutes.
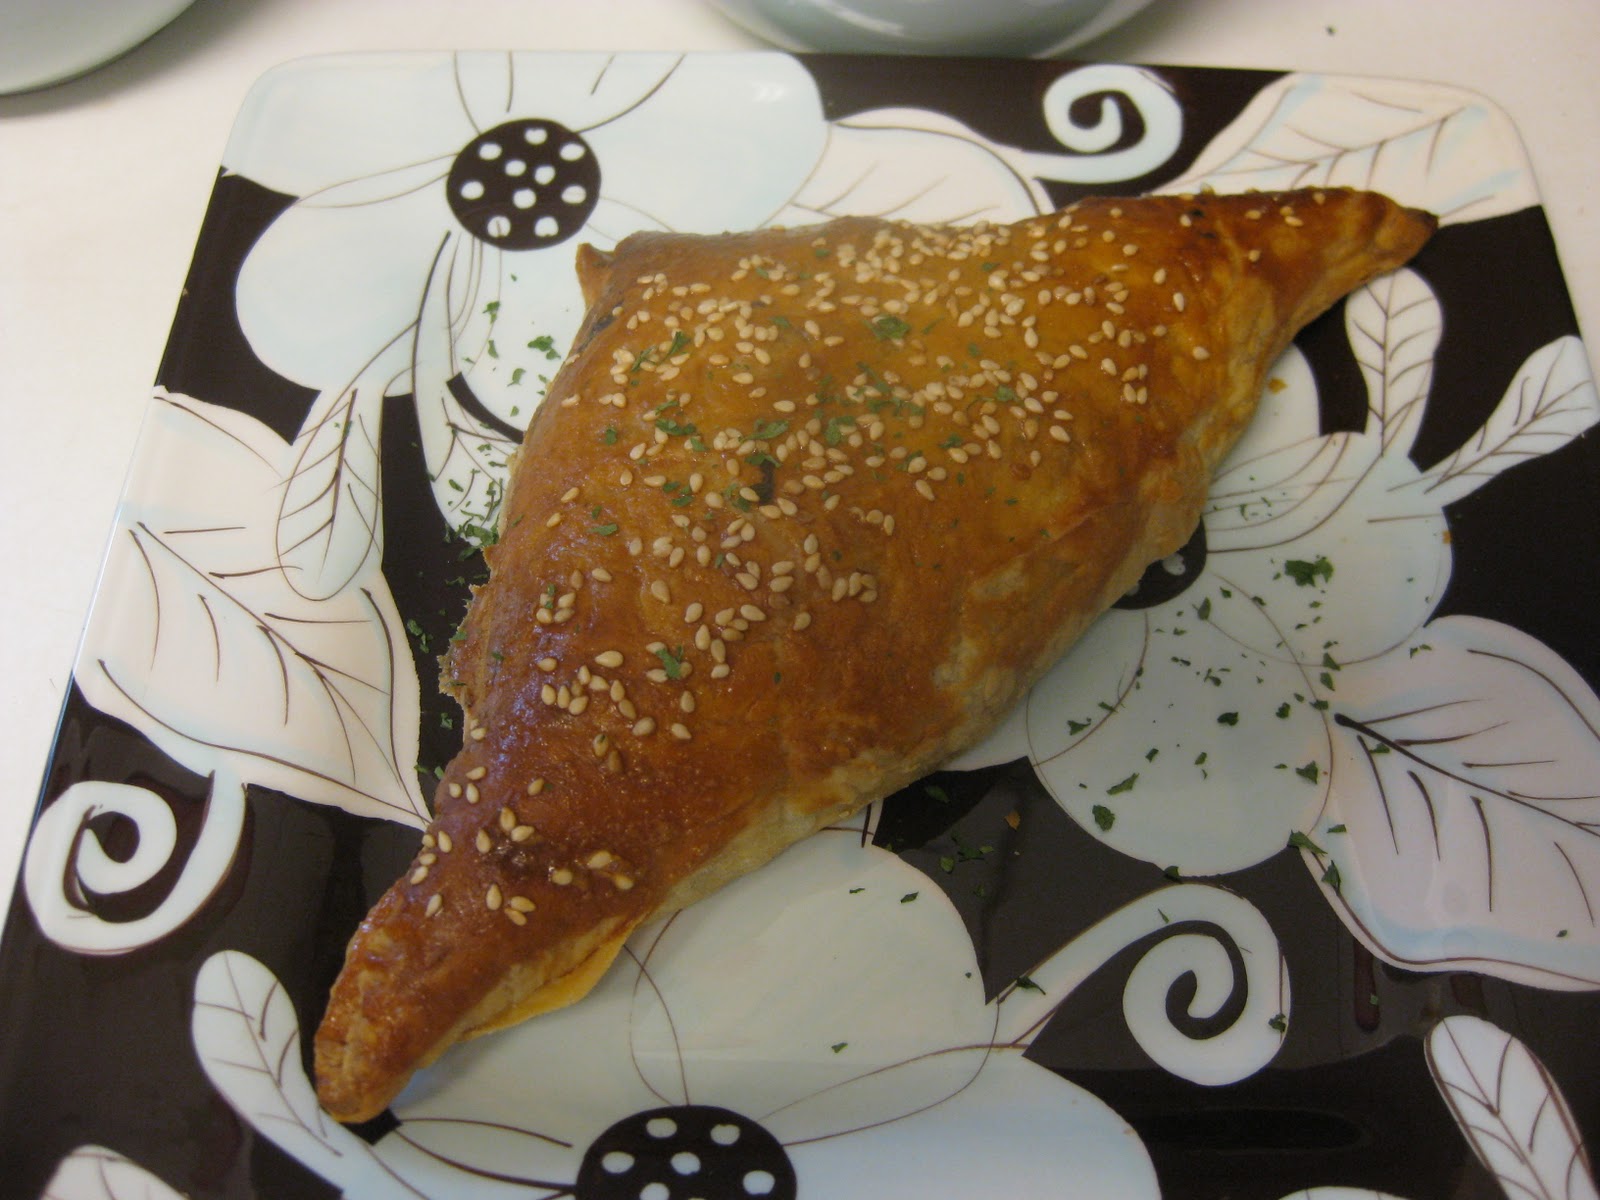
Another variation of the knish is to make a danish shape (triangle). With this one, I used the same base recipe, but also added in sauteed mushrooms. Instead of the Parmesan cheese, I used a mixture of feta and shredded mozzarella! Take that, Zomicks!
These little bites (and bigger ones) are great for appetizers, dairy or pareve- or even for Thanksgiving!
E
Filling
-In a large saute pan, saute one large onion with a drizzle of olive oil, salt & pepper
-Let it brown for a few minutes & add in 3 cloves of finely minced garlic and continue to saute, adding more olive oil if necessary (if the pan gets dry).
-Chop up a 16 oz. bag of fresh spinach (or about 2-3 cups frozen spinach, thaw and squeeze out)
-Add it to the pan and cook until wilted
-In the meantime, crack an egg into a bowl and whisk
-When the mixture cools, add it to the egg
-Add 1/4 cup parmesan cheese, & 1/4 cup of Panko crumbs or cornflake crumbs, and a tbsp. of light mayonnaise
-Season with garlic salt, pepper, nutmeg
-To make the raviolis, or the quiche cups get a package of Nesoya wonton wrappers (usually in the refrigerated area of the grocery store. There are frozen brands but they aren't as good).
-For the quiche cups, prepare a 12-cup muffin tin (you might need more than one pan). Place a wonton wrapper in each, it doesn't have to be perfect, just lightly press the center down. Lightly spray each with cooking spray, then add the filling. You don't close them, so you can add a tbsp. or more of filling. Bake at 375 for 20 minutes or until the edges are browned and the inside has set. They freeze well also!
-For the raviolis, preheat the oven to 375 degrees. Spray a foil-lined sheet pan. With a little bowl of water, rub the edges of the wonton wrapper, for sealing. Place a heaping teaspoon amount of filling in the center of each wrapper, and fold as you wish. You can make triangles, or follow the instruction on the back of the package. I made little "envelopes." Bake for 15 minutes, serve with tomato sauce.
Another variation of the knish is to make a danish shape (triangle). With this one, I used the same base recipe, but also added in sauteed mushrooms. Instead of the Parmesan cheese, I used a mixture of feta and shredded mozzarella! Take that, Zomicks!
These little bites (and bigger ones) are great for appetizers, dairy or pareve- or even for Thanksgiving!
E
Monday, September 26, 2011
15 minute meals...
For all of you moms, dads, or anyone else who is short on time & needs a really fast dinner to put together, I have a few solutions, true 15 minute meals- Rachael Ray's got nothing on me... No one said your "quick fix" meal has to be fish sticks (but if you do have the craving, don't worry, I'm totally with you on that one). This meal can literally be put together so quickly, & efficiently if you make it like Tim Gunn- make it work!!!! If you don't multi-task, you should learn, for dinners like this! Today I bought "salmon trout" which I've bought a number of times before- it's probably the fish that people pass over, because it essentially looks like yellow salmon. However, it's softer and lighter, kind of in between salmon & a white fish. Plus is that it's also very well-priced! If you can't find it, the technique can translate over to any kind of fish (i.e. salmon, seabass, tilapia...). The way I'm writing this post is the way I made the meal, so that everything is done right on time.
Maple Spiced Salmon Trout
-2 filets salmon trout or other fish
-Olive oil
-Variety of spices
-2 tbsp. maple syrup
Garlic Oil Angel Hair with Asparagus
-Angel Hair pasta (I use Barilla Plus)
-1/2 bunch of asparagus, cut diagonally
-3 large cloves garlic
-Salt
-Parsley
-Parmesan
-Bring a large pot of water to boil. When boiling, salt generously & add the angel hair pasta. Preheat the oven to 400 degrees, & prepare the salmon: spray a round tin with canola spray, & put the (2) salmon filets in. Drizzle them with olive oil. I seasoned the fish with salt, pepper, nutmeg, garlic powder, onion flakes, Italian seasonng, & parsley. You can use any blend of spices you'd like. Drizzle about 1/2-1 tbsp. (REAL) Maple Syrup over each filet, and brush all over so that it's evenly distributed, & set aside.
-The pasta should take around 7 minutes to cook. A few minutes in, put the cut asparagus in a deep metal collander, & sit it in the pot of pasta, so that some water comes up into the collander, doubling as cooking the asparagus. Alternatively, you can just add the asparagus into the pot with the pasta -it only needs a few minutes to cook- & then fish them out with a spider or slotted spoon. Shock the asparagus by transferring them to a bowl of cold water.
-Drain the pasta & put the salmon in the oven for 15-20 minutes
-In a large saute pan heat 1/4 cup of olive oil over medium heat. Grate the garlic cloves with a Microplane directly into the pan (this is essential, in my opinion, because you don't want to bite into a piece of garlic). Add a pinch of salt, & parsley, and stir. Add the asparagus & then the pasta (for this recipe, I only used enough pasta for tonight, for the 2 of us) & stir all together.
-Sprinkle parmesan over the pasta when serving.
So, in a little over 15 minutes, you've prepared a delicious & healthy dinner!!
(sorry about the poor picture)
I wish everyone a Shana Tova!!!
E
Maple Spiced Salmon Trout
-2 filets salmon trout or other fish
-Olive oil
-Variety of spices
-2 tbsp. maple syrup
Garlic Oil Angel Hair with Asparagus
-Angel Hair pasta (I use Barilla Plus)
-1/2 bunch of asparagus, cut diagonally
-3 large cloves garlic
-Salt
-Parsley
-Parmesan
-Bring a large pot of water to boil. When boiling, salt generously & add the angel hair pasta. Preheat the oven to 400 degrees, & prepare the salmon: spray a round tin with canola spray, & put the (2) salmon filets in. Drizzle them with olive oil. I seasoned the fish with salt, pepper, nutmeg, garlic powder, onion flakes, Italian seasonng, & parsley. You can use any blend of spices you'd like. Drizzle about 1/2-1 tbsp. (REAL) Maple Syrup over each filet, and brush all over so that it's evenly distributed, & set aside.
-The pasta should take around 7 minutes to cook. A few minutes in, put the cut asparagus in a deep metal collander, & sit it in the pot of pasta, so that some water comes up into the collander, doubling as cooking the asparagus. Alternatively, you can just add the asparagus into the pot with the pasta -it only needs a few minutes to cook- & then fish them out with a spider or slotted spoon. Shock the asparagus by transferring them to a bowl of cold water.
-Drain the pasta & put the salmon in the oven for 15-20 minutes
-In a large saute pan heat 1/4 cup of olive oil over medium heat. Grate the garlic cloves with a Microplane directly into the pan (this is essential, in my opinion, because you don't want to bite into a piece of garlic). Add a pinch of salt, & parsley, and stir. Add the asparagus & then the pasta (for this recipe, I only used enough pasta for tonight, for the 2 of us) & stir all together.
-Sprinkle parmesan over the pasta when serving.
So, in a little over 15 minutes, you've prepared a delicious & healthy dinner!!
(sorry about the poor picture)
I wish everyone a Shana Tova!!!
E
Monday, September 19, 2011
Chicken with Lemon Caper Sauce
Hello foodies,
I'm back!!! (for now- as I usually say after I've taken a brief hiatus)... Between school starting which always stresses me out, & Rosie being sick on and off for like the last month, things have been hectic. I am in school now 3 nights a week and get home at 9 PM, so either I eat a quick fake dinner before or in school, or Avi helps prep dinner for when I get home. Therefore, things have been slow in the kitchen! Needless to say I am all for quick dinners, & this was a chicken cutlet dish I whipped up for Friday night in less than 20 minutes- take that Rachael Ray! Super fast & really good. Serve it up with some couscous, which takes all of 5 minutes to cook, & dinner can be on the table in no time. Plus, the sauce would be perfect spooned over couscous. You can also up this recipe by making it with bone chicken- perfect for Rosh Hashana.
Chicken with Lemon Caper Sauce
-2-4 boneless, skinless chicken breasts (the reason I say 2-4 is because I used 2 large chicken cutlets for this, but depending on the size/thickness of your cutlets & how much "extra" sauce you like... you can be the judge)
-3 tbsp. flour
-Garlic powder
-Salt & pepper
-Dried Italian seasoning
-1 lemon, zested & juiced
-1/4-1/2 cup of low-sodium chicken or vegetable broth
-2 tbsp. capers, roughly chopped
-Cornstarch
-Chopped parsley
-Canola oil
-Heat a skillet with a thin layer of canola oil over medium-high heat
-On a large plate, add the flour, some garlic powder, salt & pepper, & Italian seasoning, & mix. Pat the chicken cutlets dry & coat both sides in the flour
-When the pan is hot, add the chicken cutlets. They need a few minutes per side. I usually can tell when to flip them (after say 4 minutes) when the edges around the top of the cutlet start turning white-ish. The key is to to get them golden brown.
-When the cutlets are finished cooking, transfer them to a clean plate, lower the heat to medium-low, add the juice & zest of the lemon (if it's a small lemon, or not very juicy, you can use another 1/2 or whole lemon), scraping the bottom of the pan simultaneously. The heat should be low, or even off if you are doing it immediately after taking the cutlets out. Add the broth immediately, continuing to stir. Now you can slightly raise the heat.
-Add the chopped capers, & add more broth if it doesn't seem like enough (remember I used these amounts to make 2 cutlets).
-Sprinkle in about 1/2 tbsp. cornstarch (or flour)- I recommend putting it in a fine mesh strainer, while stirring or whisking- prevents cornstarch lumps (yuck).
-When the sauce starts to thicken, add the cutlets back in (this is where they can finish cooking if you didn't completely cook them before). Coat the chicken in the sauce, & garnish with chopped parsley.
Enjoy this easy recipe for when you are short on time!!!!
E
I'm back!!! (for now- as I usually say after I've taken a brief hiatus)... Between school starting which always stresses me out, & Rosie being sick on and off for like the last month, things have been hectic. I am in school now 3 nights a week and get home at 9 PM, so either I eat a quick fake dinner before or in school, or Avi helps prep dinner for when I get home. Therefore, things have been slow in the kitchen! Needless to say I am all for quick dinners, & this was a chicken cutlet dish I whipped up for Friday night in less than 20 minutes- take that Rachael Ray! Super fast & really good. Serve it up with some couscous, which takes all of 5 minutes to cook, & dinner can be on the table in no time. Plus, the sauce would be perfect spooned over couscous. You can also up this recipe by making it with bone chicken- perfect for Rosh Hashana.
Chicken with Lemon Caper Sauce
-2-4 boneless, skinless chicken breasts (the reason I say 2-4 is because I used 2 large chicken cutlets for this, but depending on the size/thickness of your cutlets & how much "extra" sauce you like... you can be the judge)
-3 tbsp. flour
-Garlic powder
-Salt & pepper
-Dried Italian seasoning
-1 lemon, zested & juiced
-1/4-1/2 cup of low-sodium chicken or vegetable broth
-2 tbsp. capers, roughly chopped
-Cornstarch
-Chopped parsley
-Canola oil
-Heat a skillet with a thin layer of canola oil over medium-high heat
-On a large plate, add the flour, some garlic powder, salt & pepper, & Italian seasoning, & mix. Pat the chicken cutlets dry & coat both sides in the flour
-When the pan is hot, add the chicken cutlets. They need a few minutes per side. I usually can tell when to flip them (after say 4 minutes) when the edges around the top of the cutlet start turning white-ish. The key is to to get them golden brown.
-When the cutlets are finished cooking, transfer them to a clean plate, lower the heat to medium-low, add the juice & zest of the lemon (if it's a small lemon, or not very juicy, you can use another 1/2 or whole lemon), scraping the bottom of the pan simultaneously. The heat should be low, or even off if you are doing it immediately after taking the cutlets out. Add the broth immediately, continuing to stir. Now you can slightly raise the heat.
-Add the chopped capers, & add more broth if it doesn't seem like enough (remember I used these amounts to make 2 cutlets).
-Sprinkle in about 1/2 tbsp. cornstarch (or flour)- I recommend putting it in a fine mesh strainer, while stirring or whisking- prevents cornstarch lumps (yuck).
-When the sauce starts to thicken, add the cutlets back in (this is where they can finish cooking if you didn't completely cook them before). Coat the chicken in the sauce, & garnish with chopped parsley.
Enjoy this easy recipe for when you are short on time!!!!
E
Sunday, August 21, 2011
Onion Soup
So apparently onion soup was the biggest thing to make for Tisha Bav... Facebook was exploding with statuses about having onion soup for break-the-fast, or pre-fast. So when boredom & hunger really struck in the late afternoon of the fast, I decided I really wanted ANY soup (because soup is my guilty pleasure) for breaking the fast. However, I barely had any produce but I did have 3 medium sized onions. So I caved, & ventured into the delicious world of onion soup, making it for the first time & it was an absolute success! Onion soup was never something I ordered at restaurants, always thought of it as extremely heavy with all that cheese on top, I tried to control that a little. It's really easy, & this is my spin..
Onion Soup
-2 tbsp. Earth Balance + olive oil
-3 medium sized onions, cut in slices
-1.5 tbsp. sugar
-5 cloves of garlic, minced
-1/3 cup flour
-Salt & pepper
-Nutmeg
-8 cups water (or mixture of water & low sodium vegetable broth)
-Dry roux (see below)
-In a pot, heat 2 tbsp. Earth Balance, & a few drizzles of olive oil over medium-high heat. Add the sliced onions & saute, adding a little more olive oil if it gets too dry. Add some salt, pepper, and just a dash of nutmeg. Saute a few minutes, then sprinkle in the sugar. Let saute until the onions get very soft, & caramelized. Add the flour to the onions, I used a little less than 1/3 cup. Mix well. Add the garlic. I let the onions saute, lowering the heat to medium/low for about 20 minutes. If they start to stick to the bottom or seem too dry after adding the flour, start adding the water/broth. I used 2 cups of broth and the rest water.
-Add 2-4 tsp. of salt and 1/2 tsp. pepper, you can always season later on after you taste it versus over-seasoning now.
-Bring the soup to a boil, & then let simmer for at least a half hour. Mine simmered for over an hour, because I had nothing else to do! -the longer the better, letting all the flavors meld together.
-To thicken the soup, make a dry roux by taking a heaping tbsp. of Earth Balance & around 1-2 tbsp. cornstarch (or flour if you don't have), incorporating well by mashing with a fork until it becomes like a paste. Add it to the soup, & stir in well. Alternatively, you can just dissolve the cornstarch in a little warm water (you can even use some of the liquid from the soup) to form a paste, getting rid of all the lumps, & then adding that. You want the soup to have a nice silky texture, & not be too thin. Season to taste.
-Top slices of ciabatta bread with shredded cheese, & broil a few minutes. Serve with the soup, garnish with dried parsley.
(I know the picture just looks like any ordinary soup, but it was delicious, the onions were almost falling apart, & it was slightly sweet from being caramelized with the sugar-sooooo good!)
E
Onion Soup
-2 tbsp. Earth Balance + olive oil
-3 medium sized onions, cut in slices
-1.5 tbsp. sugar
-5 cloves of garlic, minced
-1/3 cup flour
-Salt & pepper
-Nutmeg
-8 cups water (or mixture of water & low sodium vegetable broth)
-Dry roux (see below)
-In a pot, heat 2 tbsp. Earth Balance, & a few drizzles of olive oil over medium-high heat. Add the sliced onions & saute, adding a little more olive oil if it gets too dry. Add some salt, pepper, and just a dash of nutmeg. Saute a few minutes, then sprinkle in the sugar. Let saute until the onions get very soft, & caramelized. Add the flour to the onions, I used a little less than 1/3 cup. Mix well. Add the garlic. I let the onions saute, lowering the heat to medium/low for about 20 minutes. If they start to stick to the bottom or seem too dry after adding the flour, start adding the water/broth. I used 2 cups of broth and the rest water.
-Add 2-4 tsp. of salt and 1/2 tsp. pepper, you can always season later on after you taste it versus over-seasoning now.
-Bring the soup to a boil, & then let simmer for at least a half hour. Mine simmered for over an hour, because I had nothing else to do! -the longer the better, letting all the flavors meld together.
-To thicken the soup, make a dry roux by taking a heaping tbsp. of Earth Balance & around 1-2 tbsp. cornstarch (or flour if you don't have), incorporating well by mashing with a fork until it becomes like a paste. Add it to the soup, & stir in well. Alternatively, you can just dissolve the cornstarch in a little warm water (you can even use some of the liquid from the soup) to form a paste, getting rid of all the lumps, & then adding that. You want the soup to have a nice silky texture, & not be too thin. Season to taste.
-Top slices of ciabatta bread with shredded cheese, & broil a few minutes. Serve with the soup, garnish with dried parsley.
(I know the picture just looks like any ordinary soup, but it was delicious, the onions were almost falling apart, & it was slightly sweet from being caramelized with the sugar-sooooo good!)
E
Sunday, August 14, 2011
Guacamole Soy Burger Sliders
This recipe was one of my 9 days dinners. I was skeptic at first, but they ended up being so delicious, you can hardly even tell that they were soy burgers. I still had slider buns in the freezer from when I made my Lamb Sliders. So, the base of these sliders was a package of soy ground "beef" from Trader Joe's- I don't think the package is quite a pound (maybe 10 or 12 ounces, I'm not sure), but I made 8 sliders from it. I served them on the slider buns with fresh guacamole, sliced pickles, & red onion.
Soy Burgers with Guacamole
-1 package Trader Joe's soy ground beef
-1 small onion or shallot
-2 minced cloves of garlic
-Salt & pepper
-Garlic & onion powder
-1 tbsp. light mayonnaise
-1 egg, lightly beaten
-1 tbsp. flax meal
-1.5 tbsp. quick cooking oats (i.e. Quakers)
-2 tbsp. (plain) Panko breadcrumbs
-Balsamic Good Seasons dressing
-1/4 cup frozen spinach, thawed, water squeezed out very well
-Chopped parsley
-Finely chop the onion/shallot, & add to a saute pan with olive oil. Add the minced garlic with the onion, salt & pepper.
-While sauteeing, add the binders (egg, mayo, flax, oats, & panko) to the ground soy beef in a bowl. Add the spices, parsley, spinach, & cooled onion/garlic mixture. I use some balsamic Good Seasons dressing for flavor, about 1/2 tbsp. or so directly in (if you're not sure what this is check it out here. It's an Italian dressing packet that you make in a pre-measured cruet with water, olive oil, & vinegar- I use balsamic. It's my go-to dressing and I always have it made in a cruet in my fridge. You can use any Italian dressing, or just leave it out entirely if you don't have anything comparable).
-Mix well with your hand, incorporating all the ingredients together. It's crucial to use a few binders, as the soy ground beef isn't as "sticky" as meat, so you need to really pack it in. If you find it isn't coming together in a consistency good enough for burgers, add more mayo or Panko. Make 8 patties, tightly packed.
-Heat a thin layer of canola oil in a large saute pan. When hot, add the patties. Once you put them in, don't move them around, or they'll fall apart. Let them cook a few minutes, until browned, & then slowly flip them with 2 metal spoons. Using 2 spoons is much better than using a spatula, which may break them.
-Make the guacamole: mash an avocado with garlic powder, onion powder, salt, pepper, lime juice, finely chopped dill, & a little light mayonnaise.
-Toast the slider buns, spread a thin layer of guacamole on the bottom bun, top with a burger, dollop a little more guacamole on top to secure the toppings- shredded lettuce, pickle, red onion, whatever you're feeling. Top with the top bun & push down.
Surprise yourself & go for a meatless Monday! You'll feel good!
E
Soy Burgers with Guacamole
-1 package Trader Joe's soy ground beef
-1 small onion or shallot
-2 minced cloves of garlic
-Salt & pepper
-Garlic & onion powder
-1 tbsp. light mayonnaise
-1 egg, lightly beaten
-1 tbsp. flax meal
-1.5 tbsp. quick cooking oats (i.e. Quakers)
-2 tbsp. (plain) Panko breadcrumbs
-Balsamic Good Seasons dressing
-1/4 cup frozen spinach, thawed, water squeezed out very well
-Chopped parsley
-Finely chop the onion/shallot, & add to a saute pan with olive oil. Add the minced garlic with the onion, salt & pepper.
-While sauteeing, add the binders (egg, mayo, flax, oats, & panko) to the ground soy beef in a bowl. Add the spices, parsley, spinach, & cooled onion/garlic mixture. I use some balsamic Good Seasons dressing for flavor, about 1/2 tbsp. or so directly in (if you're not sure what this is check it out here. It's an Italian dressing packet that you make in a pre-measured cruet with water, olive oil, & vinegar- I use balsamic. It's my go-to dressing and I always have it made in a cruet in my fridge. You can use any Italian dressing, or just leave it out entirely if you don't have anything comparable).
-Mix well with your hand, incorporating all the ingredients together. It's crucial to use a few binders, as the soy ground beef isn't as "sticky" as meat, so you need to really pack it in. If you find it isn't coming together in a consistency good enough for burgers, add more mayo or Panko. Make 8 patties, tightly packed.
-Heat a thin layer of canola oil in a large saute pan. When hot, add the patties. Once you put them in, don't move them around, or they'll fall apart. Let them cook a few minutes, until browned, & then slowly flip them with 2 metal spoons. Using 2 spoons is much better than using a spatula, which may break them.
-Make the guacamole: mash an avocado with garlic powder, onion powder, salt, pepper, lime juice, finely chopped dill, & a little light mayonnaise.
-Toast the slider buns, spread a thin layer of guacamole on the bottom bun, top with a burger, dollop a little more guacamole on top to secure the toppings- shredded lettuce, pickle, red onion, whatever you're feeling. Top with the top bun & push down.
Surprise yourself & go for a meatless Monday! You'll feel good!
E
Monday, August 8, 2011
Cinnamon Buns
When you can't eat food, BLOG ABOUT IT!
I just wanted to say that I made cinnamon buns today & they were absolutely heavenly! Granted they were in no way a short process, rather long... so if you home for a few hours one day, definitely take on this cinnamon bun challenge. The prize is WELL worth the wait. This isn't even close to any original recipe. It is 99% from a cookbook called Scandinavian Classic Baking by Pat Sinclair that I took out from the library pretty much because of the unbelievably amazing looking dessert on the front cover! I'm a sucker for cookbooks with color pictures. I followed each direction, the only thing I changed was using vanilla extract instead of almond extract in the frosting. Also, this recipe says it makes 15 rolls, for some reasons mine made 24! I wasn't complaining, & they were still nice and big!
Cinnamon Buns
- 3/4 cup milk
- 1/4 cup water
- 1/2 cup butter (1 stick), softened
- 5-5 1/2 cups all purpose flour
- 1/2 cup sugar
- 1 (1/4 oz) packet active dry yeast
- 1 tsp. salt
- 1 large egg
- 2 tbsp. butter, melted
- 1 cup firmly packed brown sugar
- 1.5 tsp. cinnamon
Frosting
- 1.5 cups confectioners sugar
- 3 tbsp. butter, softened
- 3 tbsp. milk
- 1/2 tsp. almond or vanilla extract
-Heat the milk & water in a small saucepan. Add the butter & stir until pretty much melted
-Combine 2 cups flour, sugar, yeast, & salt in the bowl of a heavy-duty mixer. Add the milk mixture & beat on medium speed until mixed. Scrape down the sides of the bowl and beat 3 minutes. Beat in the egg and add enough flour to make a soft dough, about 3 cups.
-To knead with the mixer, replace the paddle attachment with a dough hook (this is what I did, for about 5-8 minutes).
[To knead by hand, place the dough on a well-floured surface and shape it roughly into a ball. Place your fingers on top, curled slightly over the ball, and pull the dough toward you. Then push the dough away, using the heels of your hands. Turn the dough a quarter turn & repeat. When you begin kneading, the dough will be sticky. Add the remaining flour, a little at a time, if needed. Knead the dough 8-10 minutes until it is smooth and elastic. To judge whether the dough has been sufficiently kneaded, place the dough on the work surface, pull both ends gently, and release. The dough should be smooth and elastic, no longer sticky and should spring back].
-Shape the dough into a ball by pulling the sides underneath to form a smooth top. Place it top side down in an oiled bowl. Turn the dough right side up, coating it with a little oil. Cover loosely with plastic wrap.
-Let the dough rise in a warm place 1 hour or until it doubles. When the dough has doubled, the imprint will remain when you poke two fingers with it.
-Lightly grease a 9"x13" baking pan or tin (I put 4 rows of 3 in the 9x13, & I also used 2 small round tins to place 6 rolls each)
-Punch the dough down and place it on a lightly floured surface. Roll out the dough to a 9"x18" rectangle. Combine the brown sugar and cinnamon, mix well. Spread evenly with melted butter and sprinkle with brown sugar and cinnamon mixture. Roll the dough up, starting with the long edge, and pinch edges to seal.
-Cut into 1 inch slices (book says 15, I made 24). Place the rolls in a prepared pan. Loosely cover pan(s) with plastic wrap and let rise 35 minutes or until doubled.
Before rising:
-Heat oven to 350 degrees. Bake 40 minutes or until the buns are golden brown. Cool slightly.
-Combine the confectioners sugar, butter, milk, & extract in a medium bowl and beat until smooth. Pour over warm cinnamon buns.
I hope everyone has an easy & meaningful fast, I hope this post doesn't make it harder!!!!
E
I just wanted to say that I made cinnamon buns today & they were absolutely heavenly! Granted they were in no way a short process, rather long... so if you home for a few hours one day, definitely take on this cinnamon bun challenge. The prize is WELL worth the wait. This isn't even close to any original recipe. It is 99% from a cookbook called Scandinavian Classic Baking by Pat Sinclair that I took out from the library pretty much because of the unbelievably amazing looking dessert on the front cover! I'm a sucker for cookbooks with color pictures. I followed each direction, the only thing I changed was using vanilla extract instead of almond extract in the frosting. Also, this recipe says it makes 15 rolls, for some reasons mine made 24! I wasn't complaining, & they were still nice and big!
Cinnamon Buns
- 3/4 cup milk
- 1/4 cup water
- 1/2 cup butter (1 stick), softened
- 5-5 1/2 cups all purpose flour
- 1/2 cup sugar
- 1 (1/4 oz) packet active dry yeast
- 1 tsp. salt
- 1 large egg
- 2 tbsp. butter, melted
- 1 cup firmly packed brown sugar
- 1.5 tsp. cinnamon
Frosting
- 1.5 cups confectioners sugar
- 3 tbsp. butter, softened
- 3 tbsp. milk
- 1/2 tsp. almond or vanilla extract
-Heat the milk & water in a small saucepan. Add the butter & stir until pretty much melted
-Combine 2 cups flour, sugar, yeast, & salt in the bowl of a heavy-duty mixer. Add the milk mixture & beat on medium speed until mixed. Scrape down the sides of the bowl and beat 3 minutes. Beat in the egg and add enough flour to make a soft dough, about 3 cups.
-To knead with the mixer, replace the paddle attachment with a dough hook (this is what I did, for about 5-8 minutes).
[To knead by hand, place the dough on a well-floured surface and shape it roughly into a ball. Place your fingers on top, curled slightly over the ball, and pull the dough toward you. Then push the dough away, using the heels of your hands. Turn the dough a quarter turn & repeat. When you begin kneading, the dough will be sticky. Add the remaining flour, a little at a time, if needed. Knead the dough 8-10 minutes until it is smooth and elastic. To judge whether the dough has been sufficiently kneaded, place the dough on the work surface, pull both ends gently, and release. The dough should be smooth and elastic, no longer sticky and should spring back].
-Shape the dough into a ball by pulling the sides underneath to form a smooth top. Place it top side down in an oiled bowl. Turn the dough right side up, coating it with a little oil. Cover loosely with plastic wrap.
-Let the dough rise in a warm place 1 hour or until it doubles. When the dough has doubled, the imprint will remain when you poke two fingers with it.
-Lightly grease a 9"x13" baking pan or tin (I put 4 rows of 3 in the 9x13, & I also used 2 small round tins to place 6 rolls each)
-Punch the dough down and place it on a lightly floured surface. Roll out the dough to a 9"x18" rectangle. Combine the brown sugar and cinnamon, mix well. Spread evenly with melted butter and sprinkle with brown sugar and cinnamon mixture. Roll the dough up, starting with the long edge, and pinch edges to seal.
-Cut into 1 inch slices (book says 15, I made 24). Place the rolls in a prepared pan. Loosely cover pan(s) with plastic wrap and let rise 35 minutes or until doubled.
Before rising:
Straight from the oven:
-Combine the confectioners sugar, butter, milk, & extract in a medium bowl and beat until smooth. Pour over warm cinnamon buns.
I hope everyone has an easy & meaningful fast, I hope this post doesn't make it harder!!!!
E
Subscribe to:
Posts (Atom)